목차
알림 기능을 구현 중이다. 현재 프로젝트에 웹소켓을 통한 다른 유저들과의 채팅이 가능한 상태이다. 나는 메시지가 전송되면 메시지를 받는 유저에게 알림을 받도록 하려고 생각했다. 금방 구현할 줄 알았지만 복잡한 부분이 많았다.
현재 정보
- 몽고 DB에 채팅내역 저장
- private_chat_room DB에서 1:1 채팅 시 id값, title(랜덤), user1, user2의 정보가 들어있음
    public PrivateChatMessageResponseDto savePrivateChatMessage(PrivateChatMessageRequestDto chatMessageRequestDto) {
        User user = userRepository.findByUsername(chatMessageRequestDto.getUsername()).orElseThrow();
        PrivateChatMessage chatMessage = new PrivateChatMessage(chatMessageRequestDto, user);
        mongoTemplate.save(chatMessage, chatMessageRequestDto.getTitle().toString());
        PrivateChatMessageResponseDto message = new PrivateChatMessageResponseDto(chatMessage);
        message.updateUrl(user.getProfileUrl());
        return message;
    }
기존의 savePrivateChatMessage 메서드이다.
         String notificationContent = user.getNickname() + "님이 메시지를 보냈습니다.";
                String notificationUrl = "/api/chatRooms/" + chatMessageRequestDto.getTitle().toString();
                notificationService.oneMessgeNotification(받을 유저의id, notificationContent, notificationUrl);
여기서 나는 미리 구현해 둔 위와 같은 코드를 추가하여 알림 기능을 추가하려 하였다.
   // 개인 메시지 알림 생성 및 전송
    public void oneMessgeNotification(Long userId, String inviteAuthor, String url){
        Notification notification = new Notification();
        LocalDateTime currentTime = LocalDateTime.now(); // 현재 시간 가져오기
        notification.setCreatedAt(currentTime); // 생성 시간 설정
        notification.setUserId(userId);
        notification.setContent("\uD83D\uDCE71:1 메시지 알림\uD83D\uDCE7<br>" + inviteAuthor);
        notification.setUrl(url);
        notification.setRead(false);
        notification.setType("1:1 messge");

        notificationRepository.save(notification);
        sendNotificationToUser(userId, notification);
    }
oneMessgeNotification 메서드이다.
우선 간단하게 받을 유저의 정보를 가져오려 하였다. 하지만 아무리 시도해도 보내는 유저의 값은 찾기가 쉬운데 받는 유저의 정보는 어디에도 존재하지 않았다. 그러던 중 만들어둔 테이블이 떠올랐다.
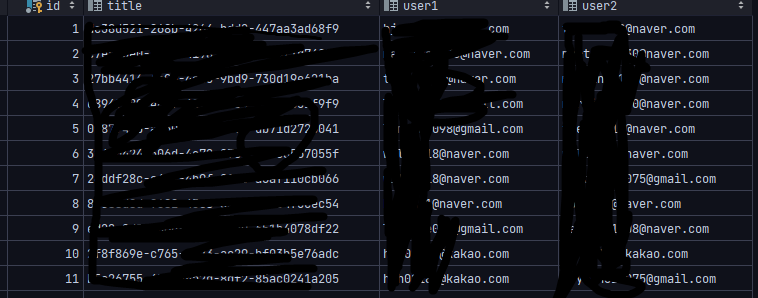
이런 식으로 채팅방이 만들어지면 유저 1, 유저 2의 이메일 주소를 저장하고 id값, title값을 랜덤으로 지정해 주는 방식이었다.
    @Query("SELECT p.user1 FROM PrivateChatRoom p WHERE p.title = :title")
    Optional<String> findUser1ByTitle(@Param("title") String title);

    @Query("SELECT p.user2 FROM PrivateChatRoom p WHERE p.title = :title")
    Optional<String> findUser2ByTitle(@Param("title") String title);
그래서 우선 해당 레포지토리에 title값을 넣으면 유저의 정보를 가져올 수 있도록 두 개의 메서드를 생성했다.
      Optional<String> user1Optional = privateChatRoomRepository.findUser1ByTitle(message.getTitle());
      Optional<String> user2Optional = privateChatRoomRepository.findUser2ByTitle(message.getTitle());

            String user1 = user1Optional.get();
            String user2 = user2Optional.get();
그다음 타이틀을 넘겨줘서 해당 타이틀에 포함된 유저 1, 유저 2의 정보를 가져온 후. get()을 사용해서 user1, user2에 넣어줬다.
if (user1Optional.isPresent() && user2Optional.isPresent()) {
            String user1 = user1Optional.get();
            String user2 = user2Optional.get();

            // 현재 사용자와 user1, user2를 비교하여 알림을 보냅니다.
            if (!user.getUsername().equals(user1)) {
                User user1Hello = userRepository.findUserIdByUsername(user1).orElseThrow(
                        () -> new IllegalArgumentException("존재하지 않는 유저입니다.")
                );
                String notificationContent = user.getNickname() + "님이 메시지를 보냈습니다.";
                String notificationUrl = "/api/chatRooms/" + chatMessageRequestDto.getTitle().toString();
                notificationService.oneMessgeNotification(user1Hello.getId(), notificationContent, notificationUrl);
            }

            if (!user.getUsername().equals(user2)) {
                User user2Hello = userRepository.findUserIdByUsername(user2).orElseThrow(
                        () -> new IllegalArgumentException("존재하지 않는 유저입니다.")
                );
                String notificationContent = user.getNickname() + "님이 메시지를 보냈습니다.";
                String notificationUrl = "/api/chatRooms/" + chatMessageRequestDto.getTitle().toString();
                notificationService.oneMessgeNotification(user2Hello.getId(), notificationContent, notificationUrl);
            }

        } else {
            //
        }
그런 후 처음에 사용하려 했던 작성해 둔 메시지 전송 코드를 넣어주었다. 2명의 유저 중 받는 사람에게 만 알림을 전송해야 하기 때문에 if문으로 두 가지의 경우를 비교해 주었다. 전송하는 유저와 title에 포함된 두 명의 유저를 각각 비교하여 전송하는 유저와 이메일 값이 다를 시 메시지를 전송해 주도록 했다.
User user1Hello = userRepository.findUserIdByUsername(user1).orElseThrow(
                        () -> new IllegalArgumentException("존재하지 않는 유저입니다.")
                );
중간에 이렇게 유저를 조회해 오는 코드를 작성한 이유는 다음과 같다. 나는 알림을 보낼 때 유저의 id값으로 비교하여 알림을 전송하는 식으로 구현하였다. 하지만 private_chat_room에는 유저의 이메일만 존재한다. 따라서 유저이메일을 넘겨주고 유저 id를 넘겨받은 뒤 알림을 전송하는 메서드에 유저 id값을 넘겨주는 식으로 구성하였다.
   /**
     * 개인 채팅방 메세지 저장
     * @param chatMessageRequestDto: 메세지 타입과, 보내는 채팅방의 ID, 유저 정보, 메세지 내용, 보내는 시간을 받아옴
     * @return: ResponseDto에 담아서 반환
     */
    public PrivateChatMessageResponseDto savePrivateChatMessage(PrivateChatMessageRequestDto chatMessageRequestDto) {
        User user = userRepository.findByUsername(chatMessageRequestDto.getUsername()).orElseThrow();
        PrivateChatMessage chatMessage = new PrivateChatMessage(chatMessageRequestDto, user);
        mongoTemplate.save(chatMessage, chatMessageRequestDto.getTitle().toString());
        PrivateChatMessageResponseDto message = new PrivateChatMessageResponseDto(chatMessage);
        message.updateUrl(user.getProfileUrl());

        Optional<String> user1Optional = privateChatRoomRepository.findUser1ByTitle(message.getTitle());
        Optional<String> user2Optional = privateChatRoomRepository.findUser2ByTitle(message.getTitle());

        if (user1Optional.isPresent() && user2Optional.isPresent()) {
            String user1 = user1Optional.get();
            String user2 = user2Optional.get();

            // 현재 사용자와 user1, user2를 비교하여 알림을 보냅니다.
            if (!user.getUsername().equals(user1)) {
                User user1Hello = userRepository.findUserIdByUsername(user1).orElseThrow(
                        () -> new IllegalArgumentException("존재하지 않는 유저입니다.")
                );
                String notificationContent = user.getNickname() + "님이 메시지를 보냈습니다.";
                String notificationUrl = "/api/chatRooms/" + chatMessageRequestDto.getTitle().toString();
                notificationService.oneMessgeNotification(user1Hello.getId(), notificationContent, notificationUrl);
            }

            if (!user.getUsername().equals(user2)) {
                User user2Hello = userRepository.findUserIdByUsername(user2).orElseThrow(
                        () -> new IllegalArgumentException("존재하지 않는 유저입니다.")
                );
                String notificationContent = user.getNickname() + "님이 메시지를 보냈습니다.";
                String notificationUrl = "/api/chatRooms/" + chatMessageRequestDto.getTitle().toString();
                notificationService.oneMessgeNotification(user2Hello.getId(), notificationContent, notificationUrl);
            }

        } else {
            //
        }


        log.info(message.getTitle());

        return message;
    }
완성된 코드이다.
'공부메모 & 오류해결 > Spring Boot' 카테고리의 다른 글
| [Spring Boot + OAUTH2.0] Spring Boot 소셜로그인(카카오) 구현법(Oauth2.0) (1) | 2023.10.10 |
|---|---|
| [Spring Boot + OAUTH2.0] 구글 소셜로그인을 위한 설정(Spring + Oauth2.0) (0) | 2023.10.09 |
| [Spring Boot + OAUTH2.0] 네이버 소셜로그인을 위한 설정(Spring + Oauth2.0) (1) | 2023.10.09 |
| [Spring Boot + OAUTH2.0] 카카오 소셜로그인을 위한 설정(Spring + Oauth2.0) (1) | 2023.10.09 |
| [ERROR] GET favicon.ico 403, 404 (Forbidden) 제거 방법 (0) | 2023.10.05 |

남건욱's 공부기록